Quick Installation Guide
Armored MySQL
A Shielded MySQL Server With Transparent Encryption and Cloud Backup
We want to thank you for choosing to deploy the “Armored MySQL” instance. You are in good company. Customers all around the world have enjoyed the benefits of our solutions since 2015. We have major installations in Europe, Asia, and the United States. Businesses use our solutions to protect their critical data and to achieve regulatory compliance. We also provide a variety of other services related to secure data transfer, storage, backup, and migration for data owners. Please contact us by sending an email to [email protected] if you have any questions. We would love to hear from you!
Introduction:
Armored MySQL is a self-protecting MySQL server instance that empowers users to control their data encryption key. This means that the encrypted MySQL data can be moved across various cloud platforms or even to your data center without requiring a new key management system or data decryption.
Our solution is fully compliant with Google's Assured Workload environments, including FedRamp Medium and HIPAA. Armored MySQL offers advanced security features such as transparent encryption of MySQL data, reduced attack surface, access controls, tamper-resistant logs, hardened instances, virtual instance security, and integrity monitoring. In addition, you can take advantage of secure backup features that include encrypted backups, cost-effective archival, flexible scheduling, and easy restoration.
By choosing Armored MySQL, you can enjoy the peace of mind that comes with having complete control over your data encryption key while benefiting from a highly secure, portable, and flexible MySQL server instance.
Installation:
For self-hosted and Equinix Metal customers:
Prerequisites:
- A valid license. If you do not have a license you can get a trial license during configuration.
- Download "asql-install" install script from www.servergeneral.com.
- A fully functional Ubuntu 18.04, 20.04 or 22.04 server is deployed next to your data source within the same network.
- A root access to the mentioned server.
- You use a virtual machine or a bare-metal server. The product is not compatible with container solutions.
- Unrestricted outbound access to the Internet
Deploy a server within your Equinix Metal (or other provider) project:
- Deploy a bare-metal server or a virtual machine within your preferred project in Equinix Metal (or other provider) dashboard;
- Select a server (or configure a VM) with resources sufficient for your planned MySQL database;
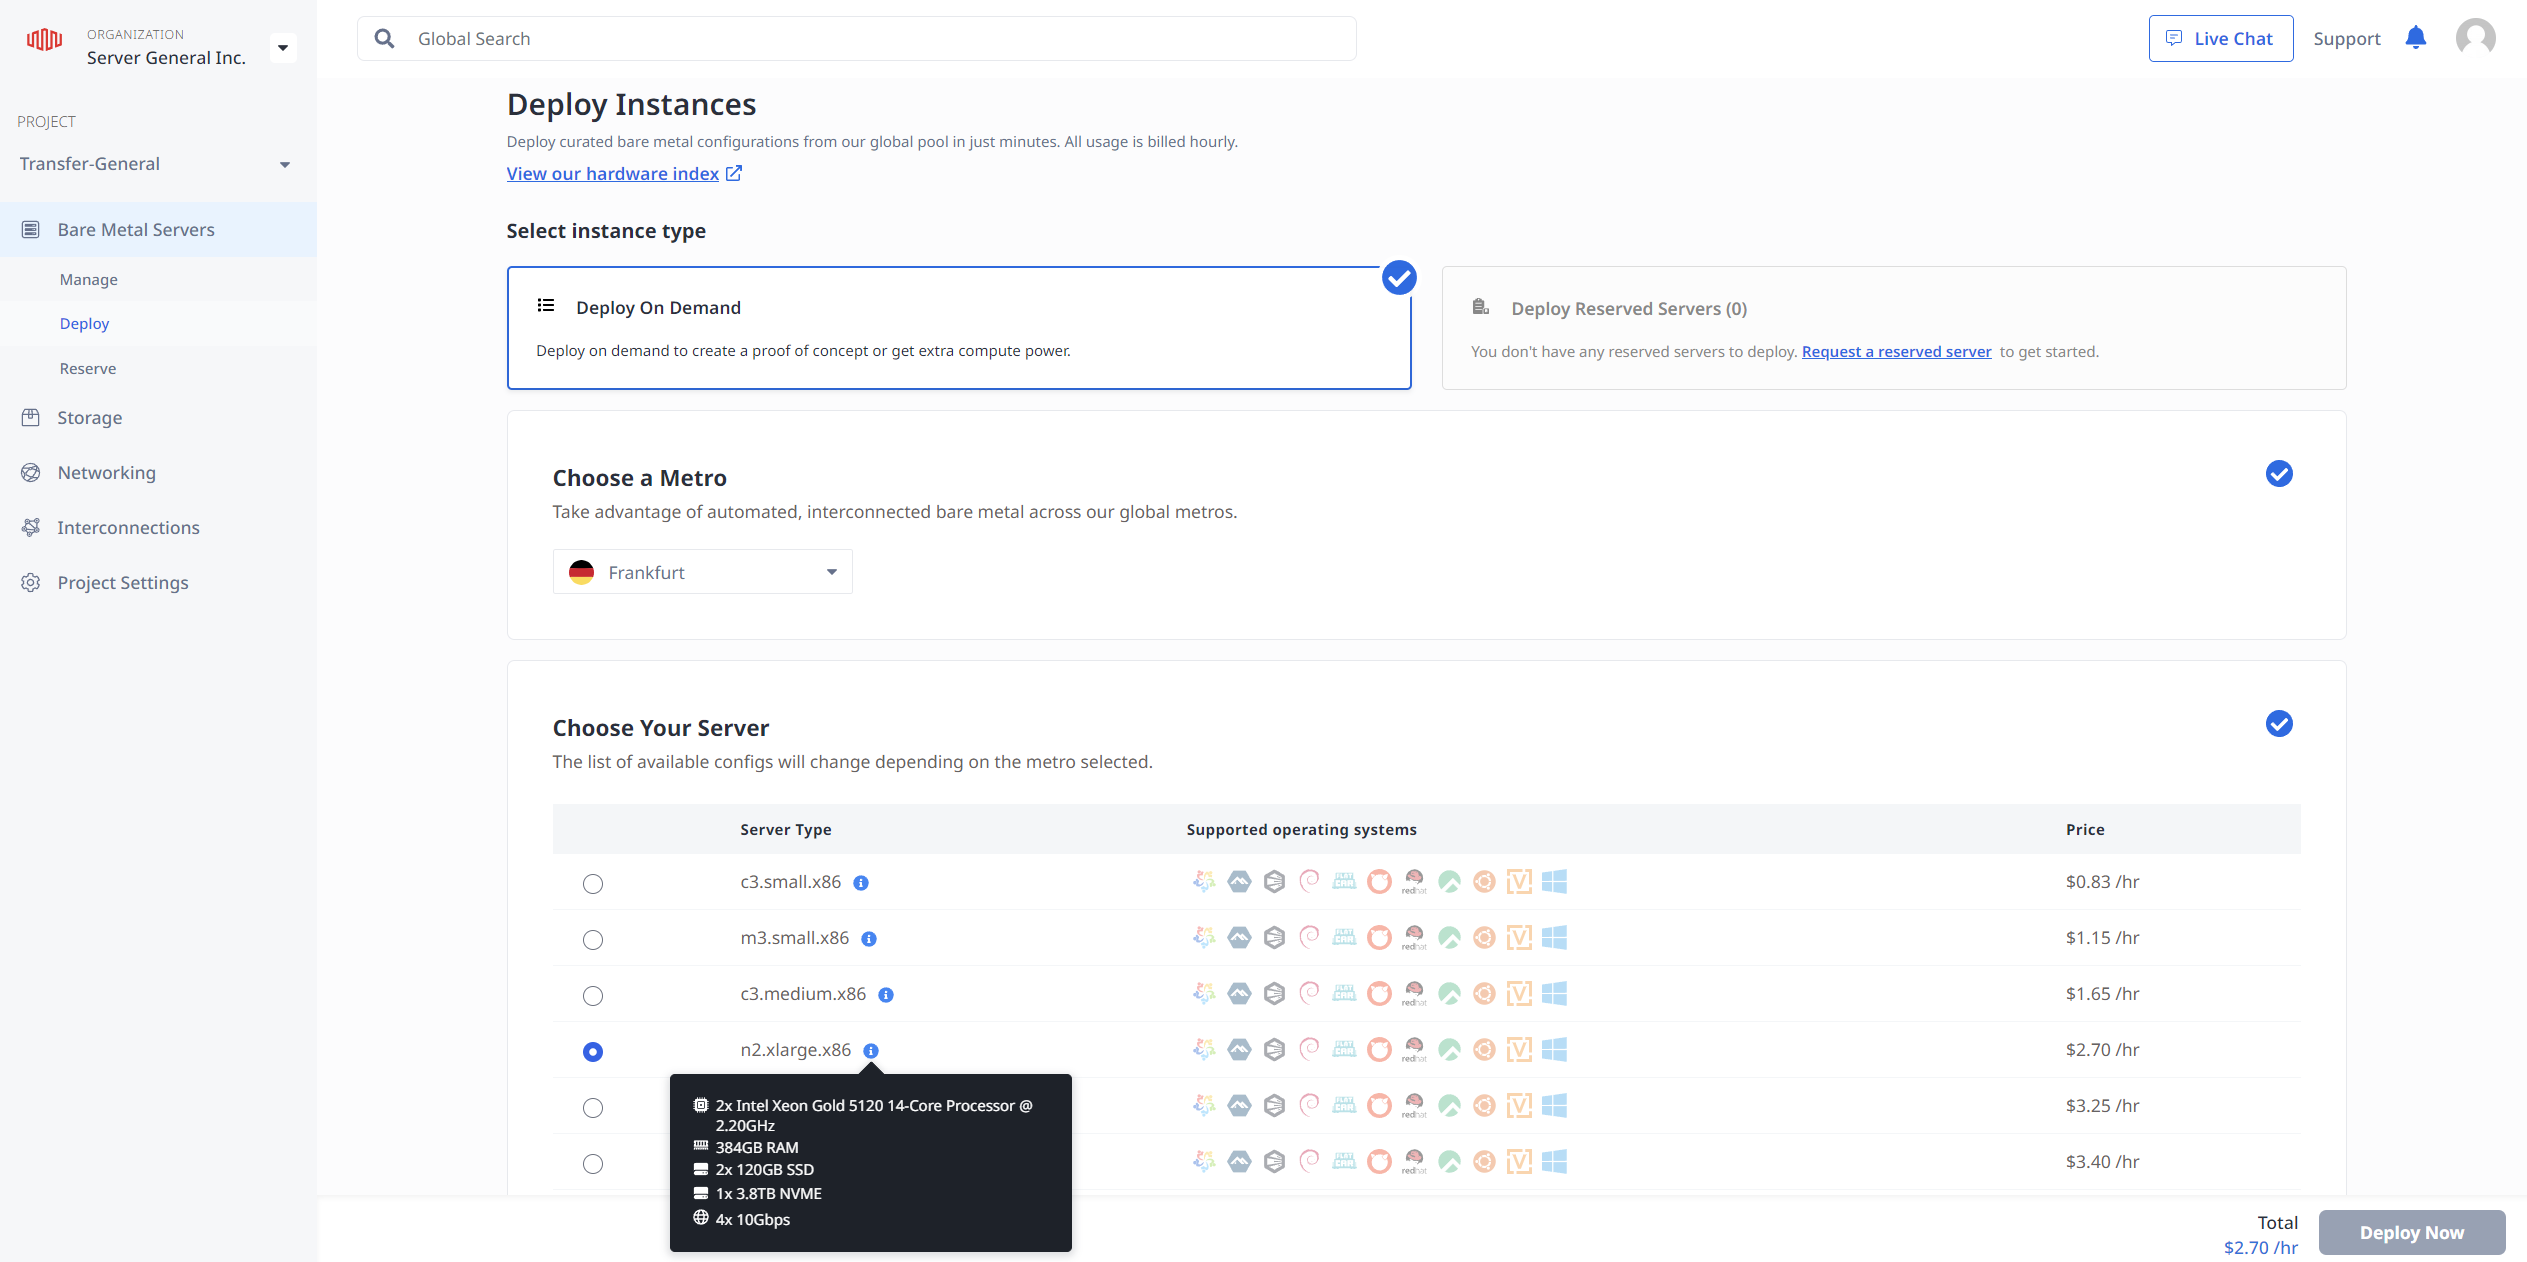
- Select (or install manually) Ubuntu 22.04 for the installation on the server;
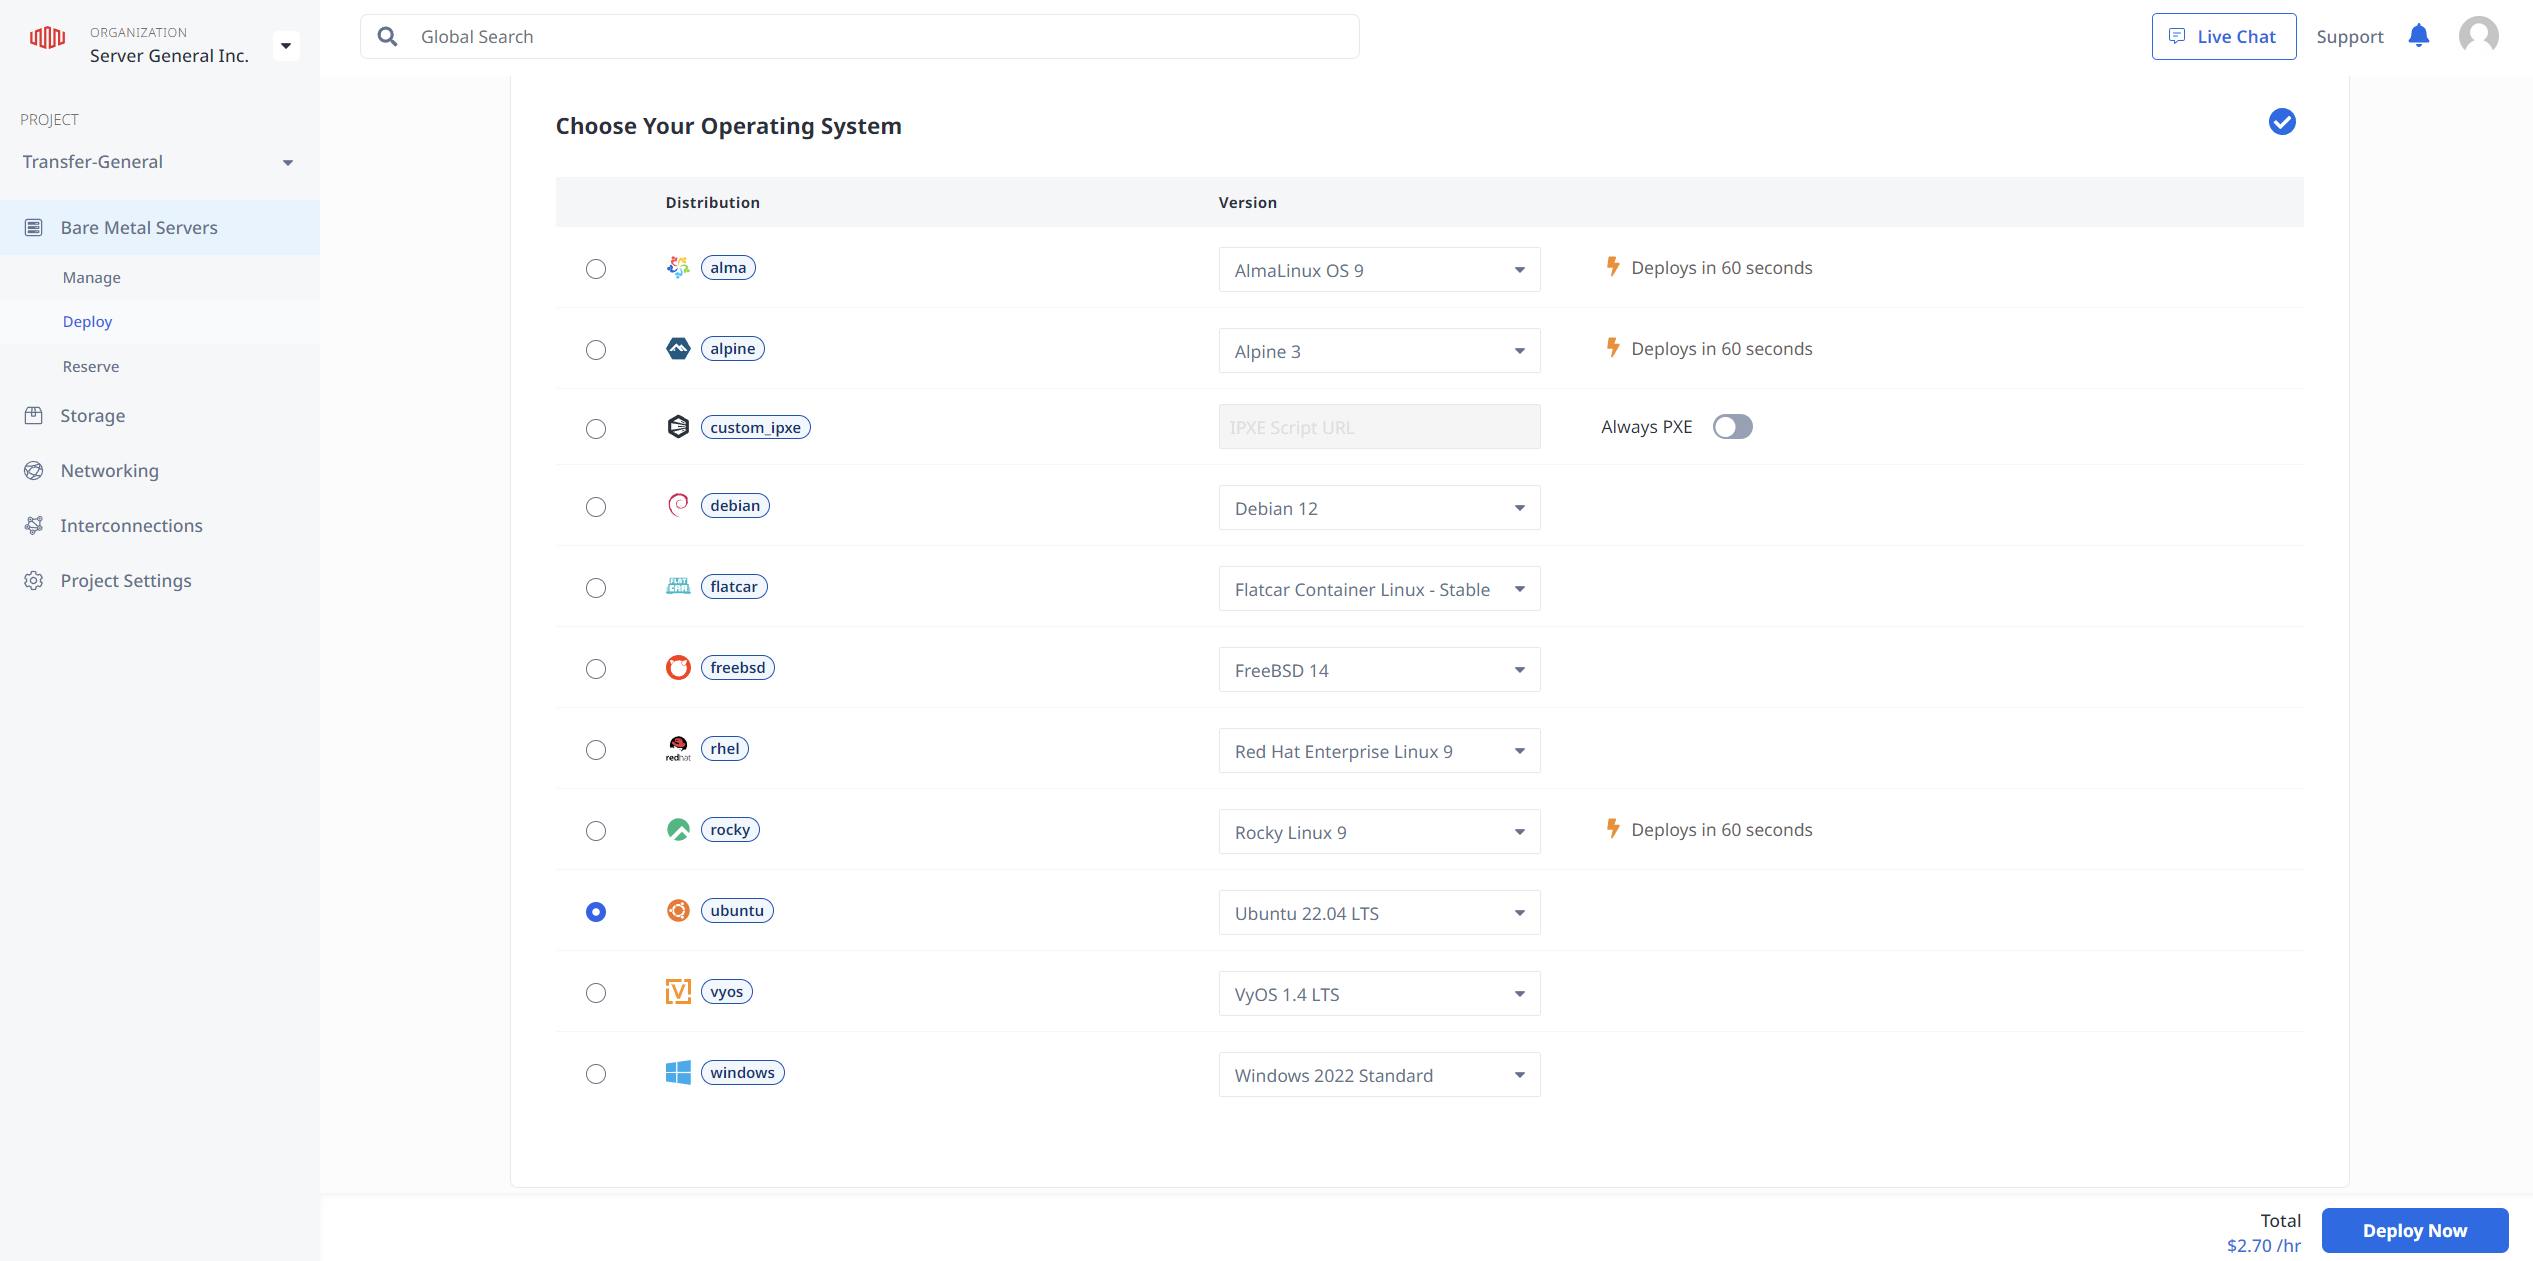
- Deploy the machine and wait for your OS to be up
- Update your system
$ ssh -l<user-id> <IP Address of your target server>
$ sudo apt-get update

$ sudo apt-get upgrade
Deploy Armored MySQL using installation script:
- Copy the downloaded "asql-install" install script onto your newly deployed server using your preferred tools (e.g. SFTP);
- Make sure that the "asql-install" file is executable. If it’s not, then change permissions:
$ sudo chmod +x asql-install - To install Armored MySQL, run the install script with the "-m" flag:
$ sudo ./asql-install -m - Wait for the script to finish and proceed to the Configure Your Instance section.
For Google Cloud Platform Customers
Prerequisites:
- An active Google Cloud Platform account: To install Armored MySQL on Google Cloud, you must have an active Google Cloud Platform account. If you don't have an account yet, you can sign up for a free trial at https://cloud.google.com/free/. Once you have an account, you'll need to create a new project to deploy the Armored MySQL solution.
- Proper privileges to install a Google Marketplace virtual machine instance: To install Armored MySQL from the Google Cloud Marketplace, you must have proper privileges to create and manage virtual machine instances in Google Cloud. This typically requires the "Compute Instance Admin" or "Project Owner" role in Google Cloud IAM.
- Additional permissions to create and manage storage resources: If you plan to use Google Cloud storage to store your encrypted backups, you will need to have additional permissions to create and manage storage resources. This typically requires the "Storage Admin" or "Project Owner" role in Google Cloud IAM.
- A valid trial license: During the installation process, you will have the opportunity to acquire a free trial license for Armored MySQL that is valid for 30 days. This trial license will enable you to test the solution and its features before deciding to purchase a subscription. After the trial period, you can purchase a subscription to continue using Armored MySQL.
Accessing the Armored MySQL solution in Google Cloud Marketplace:
Goal - At the end of this step, your secure MySQL server instance will be running on Google Cloud Engine.
Once you have met the prerequisites, you can proceed with accessing and deploying Armored MySQL on Google Cloud. Follow these steps:
- Log in to the Google Cloud Console at https://console.cloud.google.com/.
- Click on the "Marketplace" button on the left sidebar.
- In the search bar at the top of the page, search for "Server General".
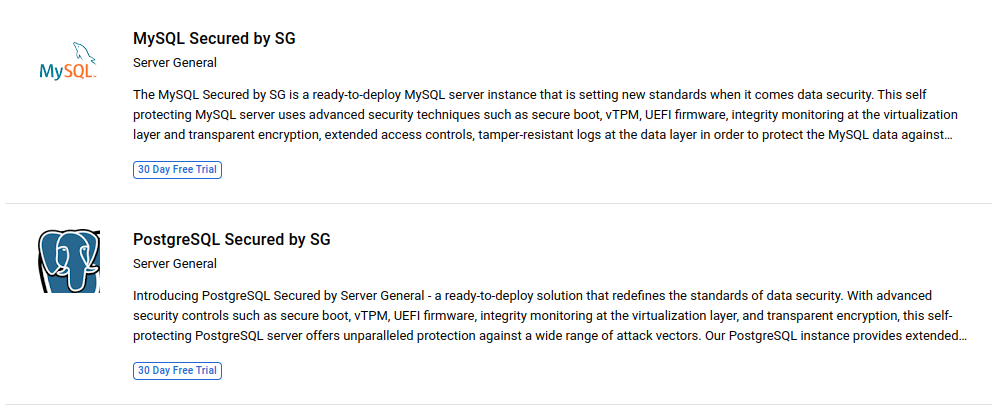
- Select "Armored MySQL" from the list of search results.
- On the Armored MySQL product page, click the "Launch on Compute Engine" button.
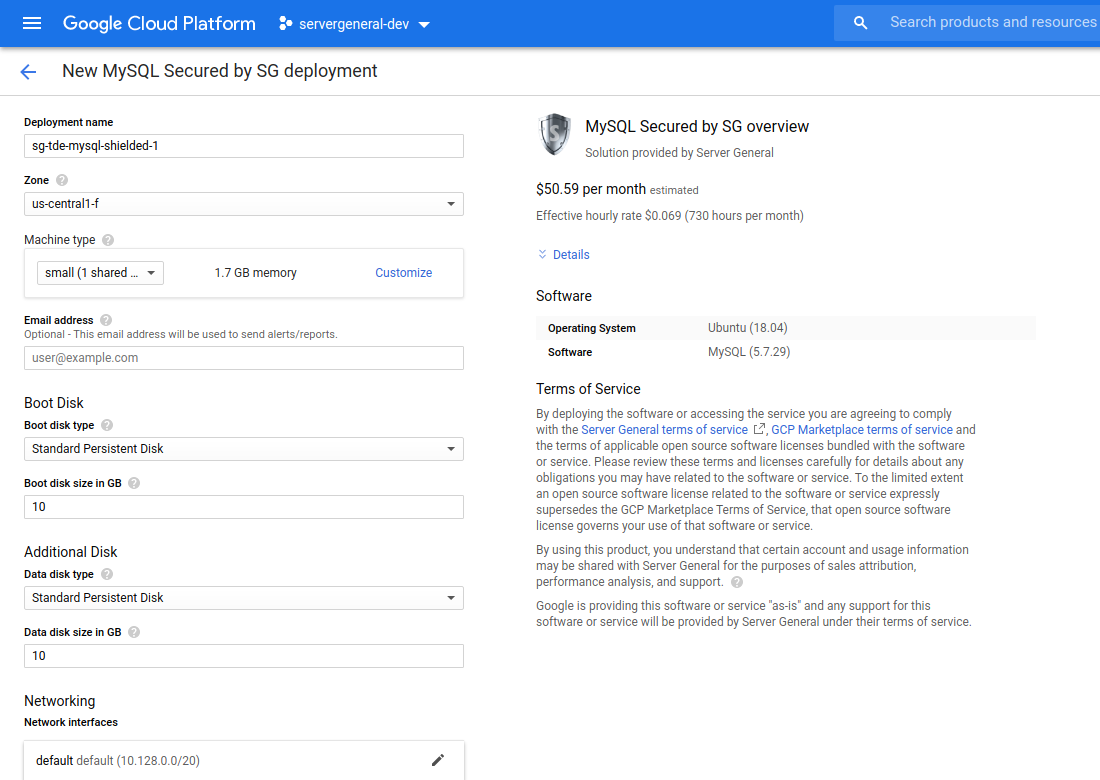
- Configure the virtual machine template using the following information:
- Deployment name: Enter a unique identifier for the deployment.
- Zone: Select the geographic region of the data center hosting the deployment.
- Machine type: Select the CPU and RAM types that are appropriate for your deployment.
- Boot disk type: Select the disk type that is appropriate for your deployment.
- Boot disk size in GB: Select the storage capacity that is appropriate for your deployment.
- Additional disk size in GB: Select storage capacity after carefully considering your data storage requirements. Please note that the second disk is used to store your encrypted data sets. Your second disk should be twice as large as your data set.
- Click the "Deploy" button to proceed.
- Wait for the virtual machine instance to be created and initialized. Once complete, you can access the Armored MySQL solution using a web browser.
- Follow the on-screen instructions to configure your instance.
Configure Your Instance
Goal - At the end of this step, your Armored MySQL instance will be fully configured and your MySQL data will be encrypted.
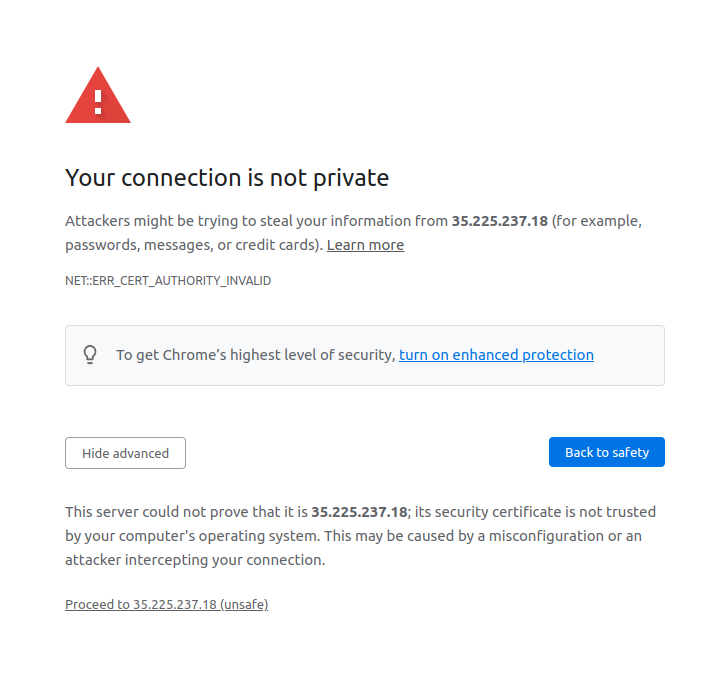
- Access your instance by clicking on the link provided on the Deployment Manager page or opening a web browser and typing in the IP address of your machine: https://<IP address of your machine>>/. Ignore any invalid SSL certificate warning and proceed.
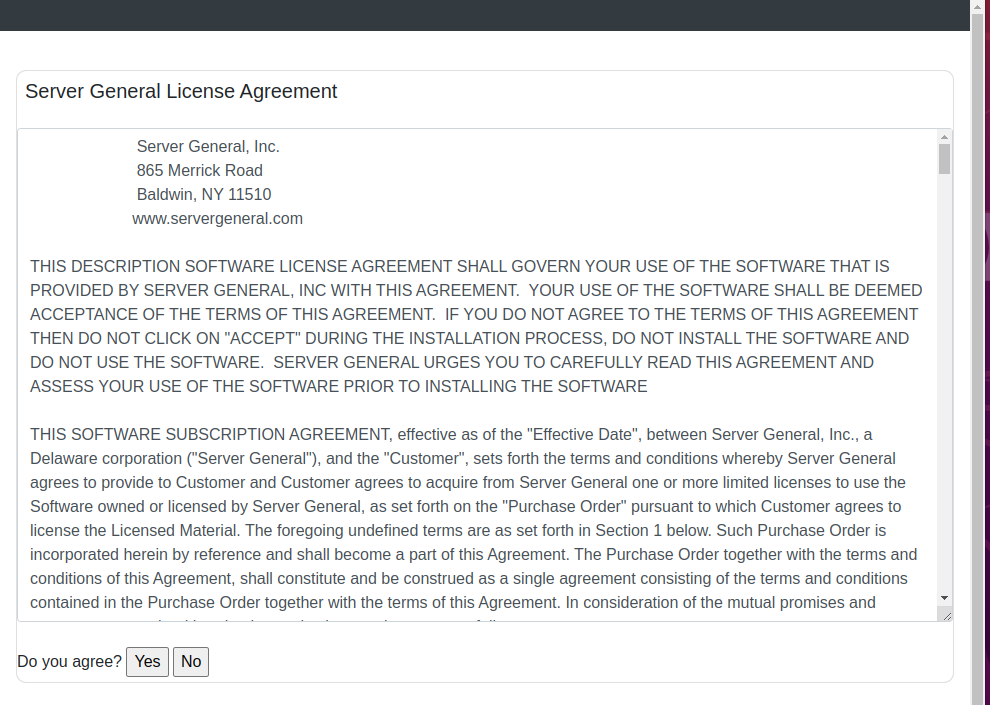
- On the License Agreement page, scroll down and accept the terms and conditions to proceed with the configuration.
- Next your machine will run a connectivity test to make sure that it can access the licensing server, key lockers, and logging servers. Click process if the test passes or else check your firewall settings and make sure that you are not restricting outbound TCP/IP traffic.

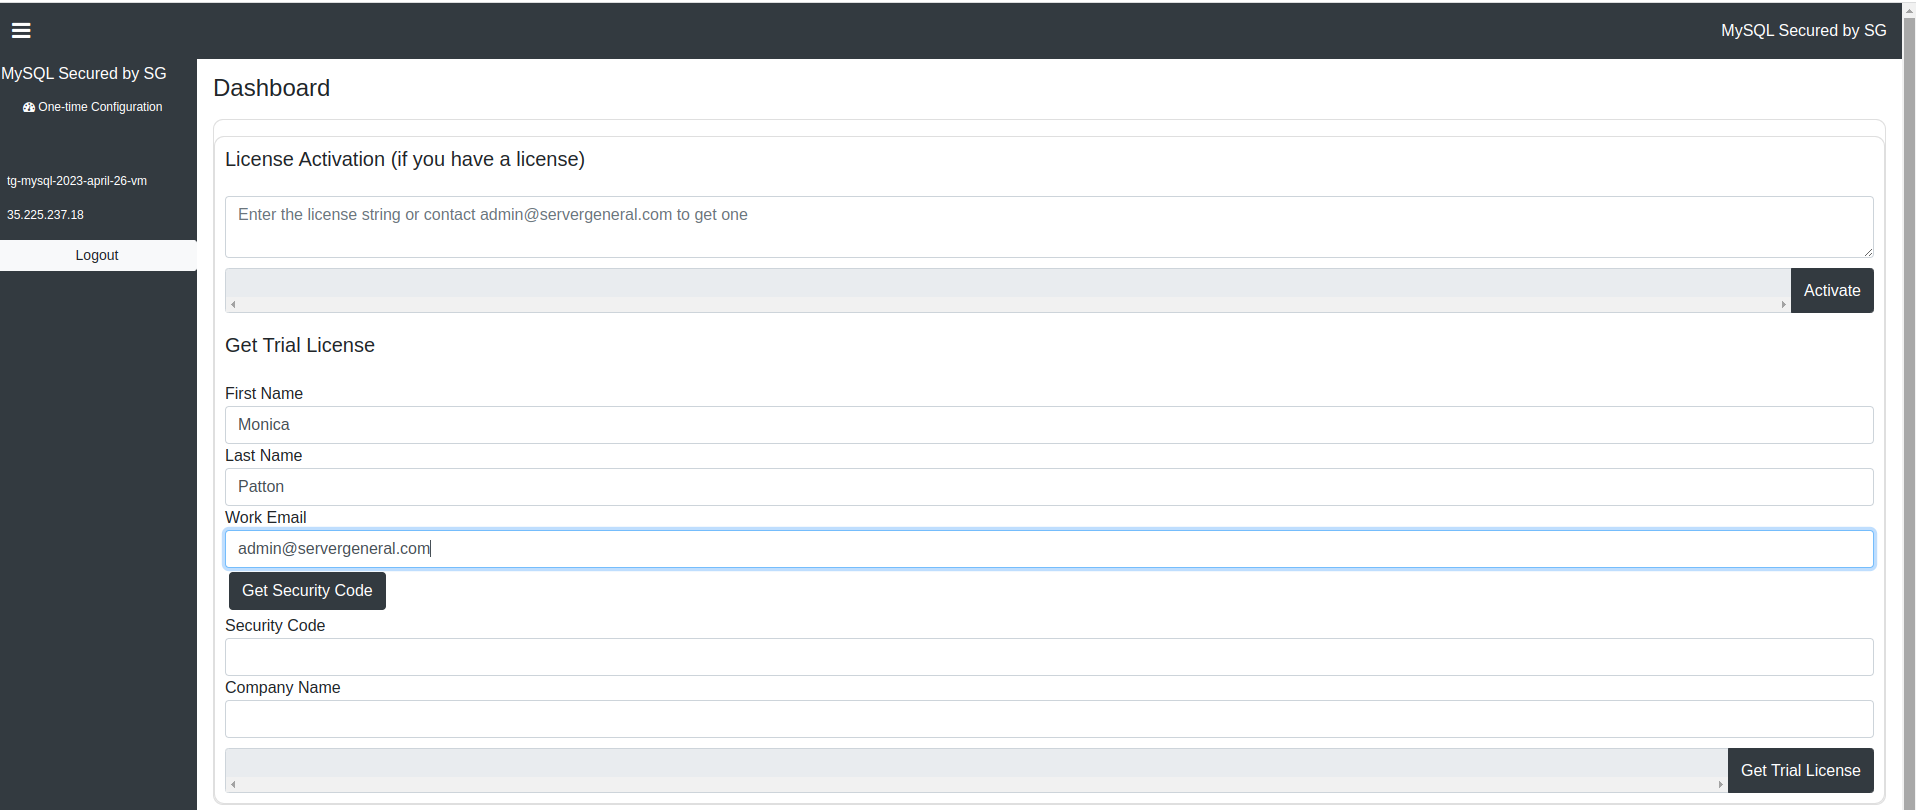
- License your machine by entering a valid license or requesting a 30-day trial license. If you opt for a trial license, you'll need to confirm your email address to receive a security code. Enter the security code to receive your trial license.
- Configure the "sgadmin" user by assigning a password. This user is a system user, and all commands are issued in the context of this user.
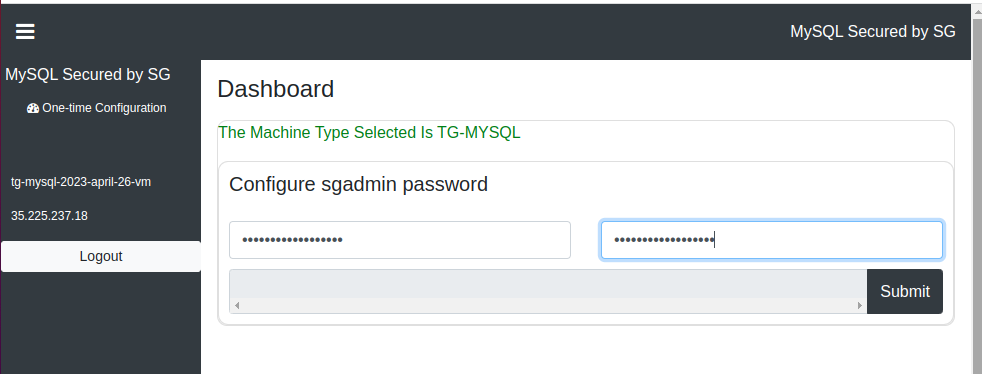
Remember the password, as you'll need it to log into the web management console of your machine.
- Configure the Security Officer (SO) by selecting an alpha-numeric string of length 16 or more characters, called the Security Officer's Master Key (SMK).

Write down this string as you won't be able to recover it if lost.
- Configure the Data Administrator (DA) by selecting an alpha-numeric string of length 16 or more characters, called the Data Administrator's Master Key (DMK). You'll need to enter the SMK to initialize the DA since only the SO can add or remove a DA.
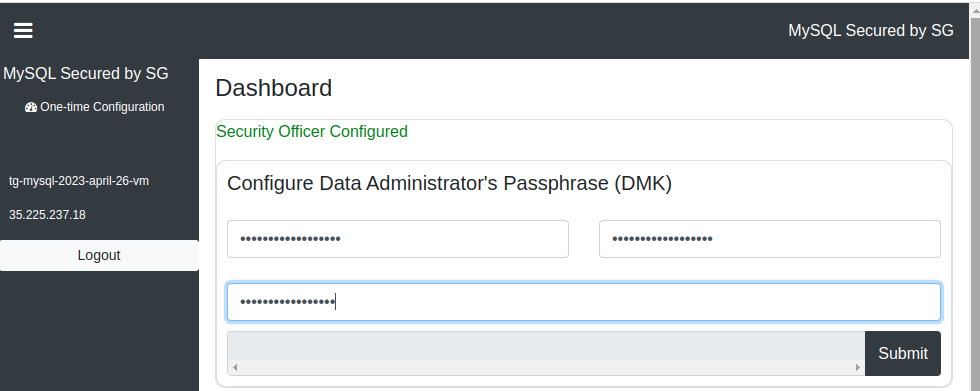
Write down the DMK as you'll need it to manage all operations related to your protected data sets.
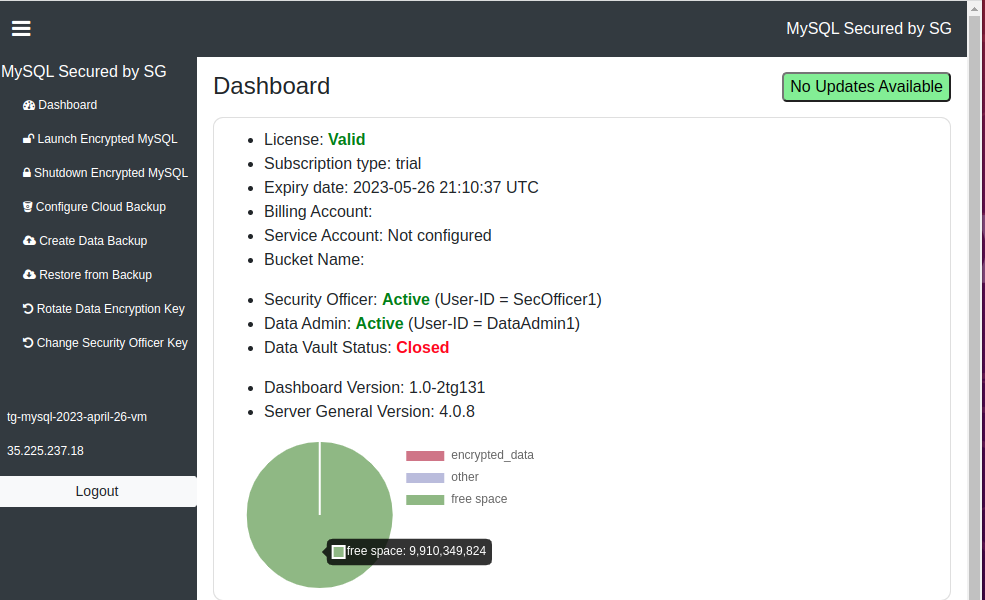
- We’ll configure the MySQL “root” user for you and you’ll find the password on the Dashboard. We highly recommend that you change this password as soon as possible.
After completing these steps, a new security policy will be implemented that will encrypt your MySQL data, and start your MySQL server. Only the "sgadmin" and "mysql" users will be allowed to see the data in clear text. You will control the data encryption key. Note that your application will continue to access the MySQL data as we use transparent data encryption. Your dashboard will look like this:
Verify Installation
Goal - At the end of this step, you will be able to see that your data is encrypted and our advanced access control rules are enforced.
Your MySQL data has already been encrypted and the advanced access control mechanisms are now being enforced. Therefore, only the “allowed users” should be able to access the unencrypted data sets. All other users (including the “root” user) should not be able to view the cleartext data.
We’ll test our hypothesis below. We assume that you’ve used the option "Launch Encrypted MySQL" option from the web console to start your MySQL server.
First, we will verify that the MySQL user, as well as the “sgadmin” user, can still see the data even though it is encrypted. Open up a new SSH window and log in to your instance as the “sgadmin” user. If you are using a Linux machine, then you can use the ssh command to log into your machine.
$ ssh -i <path to google compute engine key stored on your computer> sgadmin@<IP address of your server>
You can also use the “gcloud” command to log into your machine. It will look like this:
gcloud compute --project "project-name" ssh --zone "us-central1-f" "sgadmin@name-of-your-vm"
Query any table of importance to you--here we’ll establish a MySQL connection and execute a query on the “user” table (which holds database credentials). You should get similar results:
mysql -u root -p -e 'USE mysql; SELECT user, host, authentication_string FROM user;'
Enter the password when prompted.
mysql -u root -p -e 'USE mysql; SELECT user, host, authentication_string FROM user;'
The output should look like this:
+------------------+-----------+-------------------------------------------+
| user             | host      | authentication_string                     |
+------------------+-----------+-------------------------------------------+
| root             | localhost | *8A5BBB2137D6AFC5CD5D6517FC37CDBA4A12C149 |
| mysql.session    | localhost | *THISISNOTAVALIDPASSWORDTHATCANBEUSEDHERE |
| mysql.sys        | localhost | *THISISNOTAVALIDPASSWORDTHATCANBEUSEDHERE |
| debian-sys-maint | localhost | *33EB87AE1B08A53C99887414CC54645E81AD8D9E |
+------------------+-----------+-------------------------------------------+
The above test proves that the “mysql” user is still able to see the data in cleartext.
Now let’s see if the “sgadmin” user can see the data in cleartext at the OS layer. Start a new terminal session and log in as the “sgadmin” user using the “gcloud” command that should look like this (or you can SSH into the machine using the Google Compute Engine key stored on your machine):
gcloud compute --project "your-project-name" ssh --zone "us-west1-b" "sgadmin@name-of-your-vm"
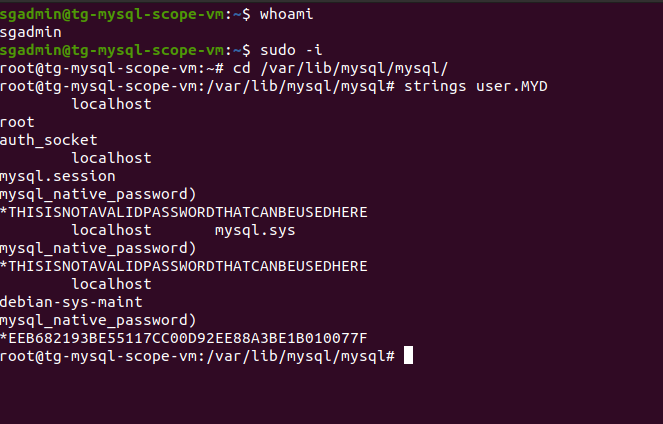
The “sgadmin” user should be able to see the MySQL data per our security policy above.
$ sudo -i

# cd /var/lib/mysql/mysql

# ls -lt

# strings user.MYD
You can copy the above commands and paste them into your SSH terminal to perform the tests.
—--------------------------------------------------------------------
The last command in the series above will show you the plain text characters scraped from within the file.
Please note that the file you are looking at is in fact encrypted but the “sgadmin” user is still able to see the data in cleartext.
You can see your encrypted files:
$ sudo ls -lt /vault/serverg/security_policy_tg2
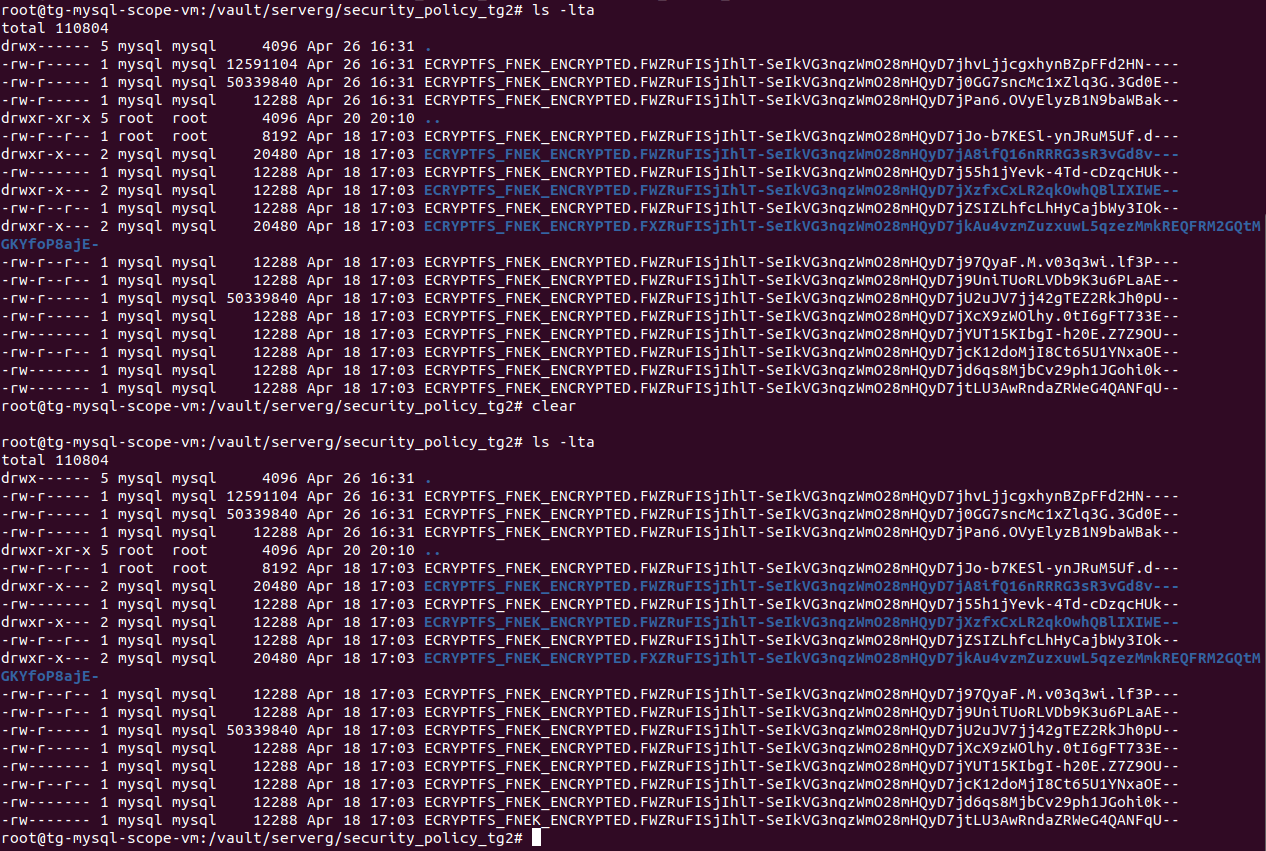
Here you will find the encrypted version of the MySQL files which were previously stored in /var/lib/MySQL.
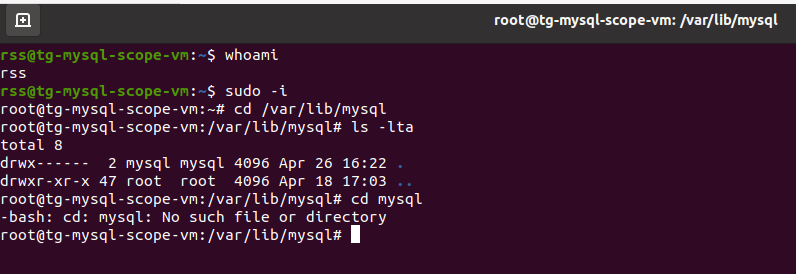
Now if you want to see what unauthorized users will see, then you should log out again. It is essential that you log out and log back in as any other _system user who is _part of the group “sudo”. Elevate your privileges and then try to access /var/lib/MySQL. You will notice that even though you are the “root” user you are unable to access the protected files. The following command generates an error stating no such file exists.
# cd /var/lib/mysql/mysql
This command should show an empty directory like this:
Note: What To Do After You Reboot Your Instance
IF YOU REBOOT YOUR “Armored MySQL” INSTANCE YOU MUST START YOUR MySQL SERVER USING THE "LAUNCH MySQL SERVER" OPTION FROM YOUR "Armored MySQL" CONSOLE.
To do this, log into your "Armored MySQL" console by opening up a browser and typing in the following URL:
https://<IP address of your machine>
Once you are logged in, click on the "Launch MySQL Server" button to start your MySQL server.
NOTE: DO NOT START YOUR MySQL SERVER MANUALLY USING THE COMMAND LINE UNLESS YOU KNOW WHAT YOU ARE DOING.
Updated on October 11, 2024